Showing posts with label quilting. Show all posts

Wednesday, 1 May 2013

Caught up at last

april-sisters-ten-BOM-2 april-sisters-ten-BOM-1


I'm on a roll this week :) I've finally caught up on the Sisters' ten BOM and it feels goood! April's block is called Lady of the Lake. I had planned to use my long lost thangles to make the small HST's for these blocks but when I looked at them properly I noticed that they were for 2" units not 2.5" needed, duh!! 

sisters-ten-bom-collage-so-


Anyway not to worry, here are all the blocks so far. Now I need to make some headway on the Lucky Stars BOM, especially since May's block just popped up in my email this morning.


Bye for now

post signature

Wednesday, 24 April 2013

more flea market fancy blocks

march-sisters-ten-BOM-1

I'm almost caught up on the Sisters' Ten BOM, only April to do and I had to hold off on them as I needed more kona white. I am kidding myself that this quilt won't really cost me much to make as I already had the FMF stashed but of course I still need to buy background/sashing and as usual I've totally not counted in backing fabric...

Anyway here are the blocks for March made from a block called School Girl's Puzzle. I'm not really that sold on the pink fabric, a bit too sugary for me but I'm going with it anyway.

march-sisters-ten-BOM-2

April's block is Lady of the Lake and there are loads of hsts to be made so I think I'll be trying out the Thangles that I bought ages ago from M is for Make. Lots of folks were raving about them at the time but I put them in a safe place and yes you guessed it I then couldn't find them! I discovered them again the other day so I reckon I'd better use them before they go into hiding again.

Bye for now
post signature


Wednesday, 17 April 2013

sewing again

Hi there folks I hope you're all doing fine. After what seems like months I'm back at the sewing machine.... yay, yay and thrice yay!! Kirstin is back to full fitness, the Easter Holidays are done and dusted, the return to 'normal' has begun.

First up this week was a present for my brother's birthday which is on Friday  He requested a slip cover for his Nexus 7 and unusually for me I had it made and posted at the beginning of the week. It should be well on the way to Shetland by now - no picture just now so as not to spoil the surprise.


feb-sisters-ten-BOM-1


I have quite a bit of catching up to do on the Block of the Month front so first up this week were the February blocks for the Sisters' Ten BOM.


feb-sisters-ten-BOM-2


I really enjoyed doing these, I knew I'd missed sewing but not just how much until I got started again on these. The novelty of the automatic thread cutter on my new-ish machine still hasn't worn off and weirdly I actually loved pinning and pressing these blocks too.

This is a quick post to get me back into the swing of things plus I've got to collect Jamie from Anchor Boys so off I dash, see you soon.

Happy sewing!

Bye for now

  post signature

Tuesday, 5 March 2013

no waste flying geese

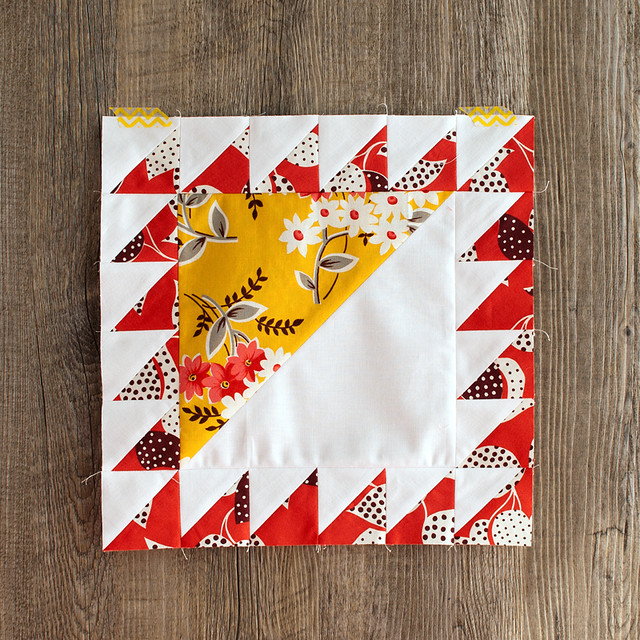
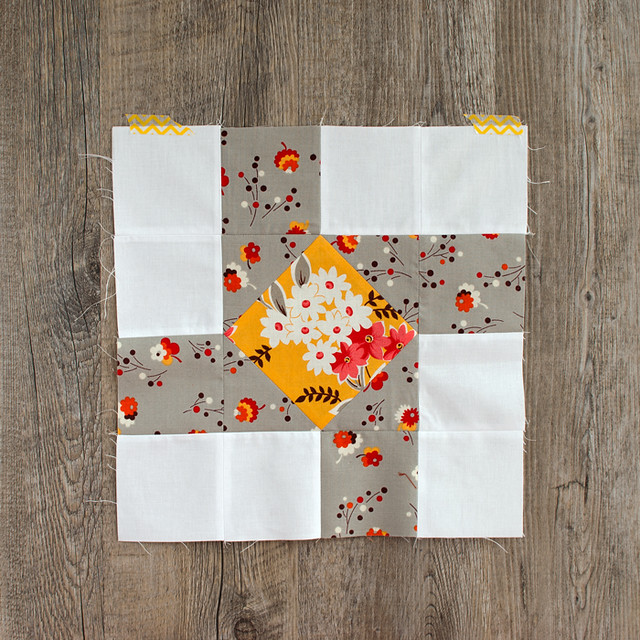
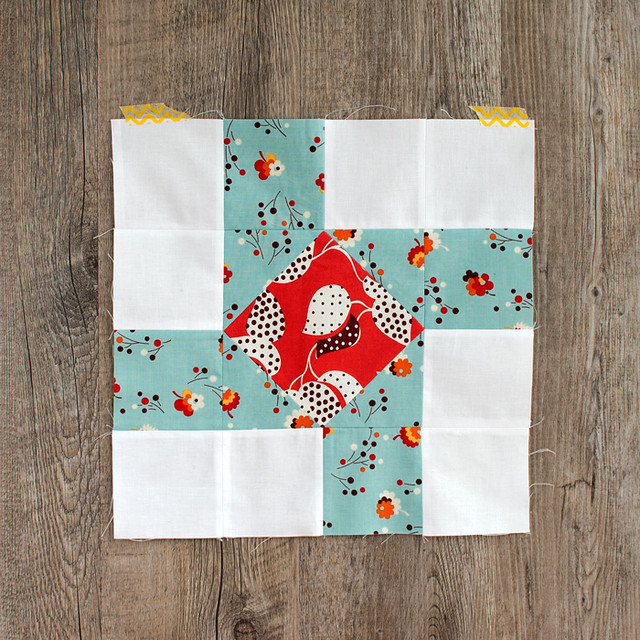
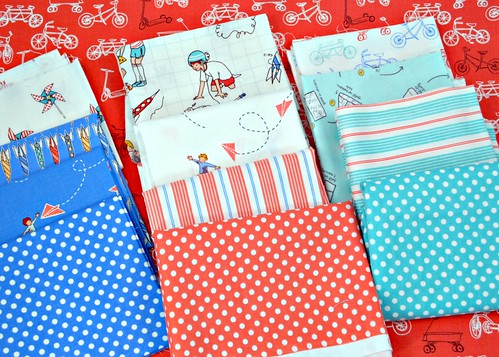
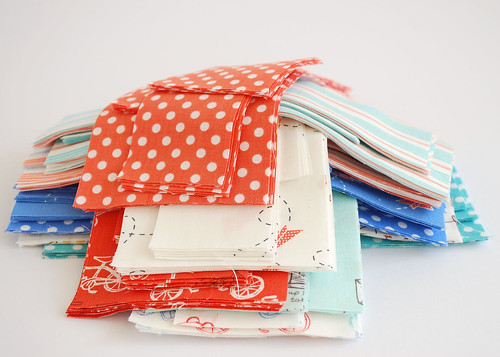
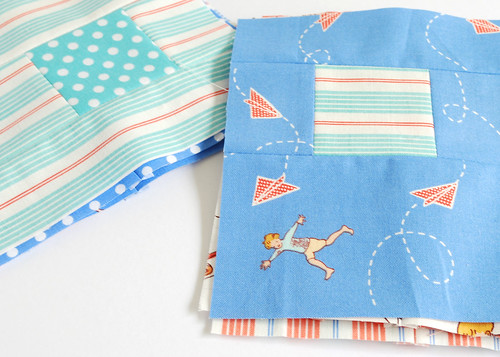
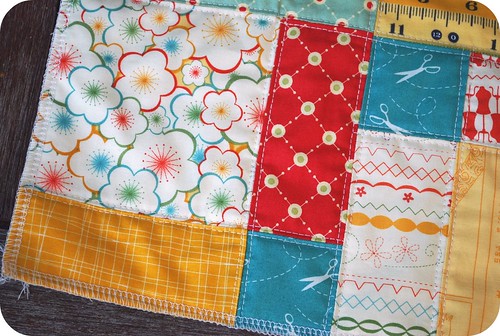
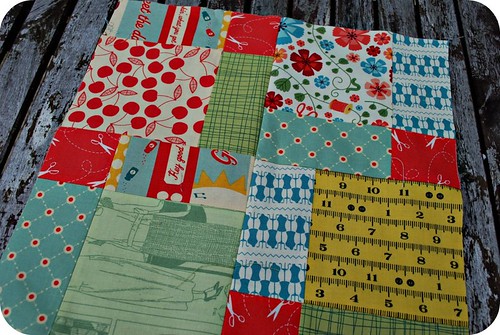
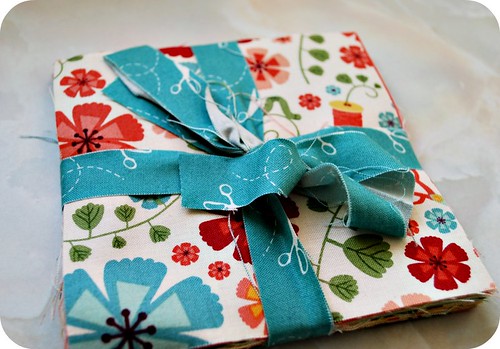
As I mentioned previously I thought I'd try using different methods to make up the component pieces for my next batch of swoon blocks. Cutting out is my least favourite part of quilting so anything that  helps on that front is very welcome. I do have a Sizzix Big Shot , lots of folks really seem to get on well with using these instead of rotary cutting but  I have very few dies at the moment. Something to look into at some point regarding which dies would be most useful.


swoon-blocks-in-progress-2

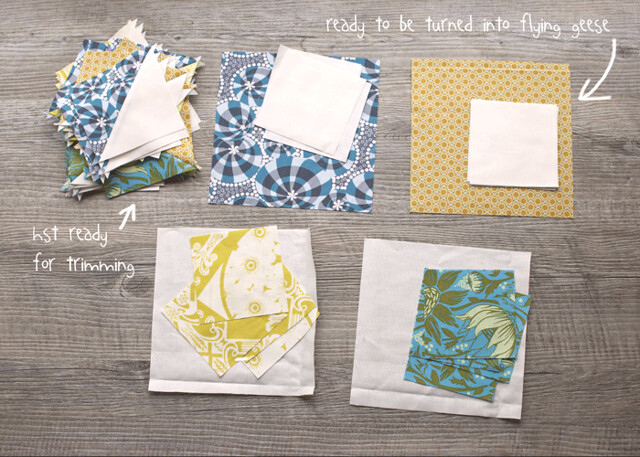
The swoon blocks use HST and Flying Geese blocks, the HSTs I have down pat now but flying geese  -  not so good.  I remembered Toni recommending the 'no waste flying geese' method so I thought I'd give that a go. This is the tutorial by Melissa at The Happy Quilter that I used and I have to say this method is definitely on my thumbs up list.

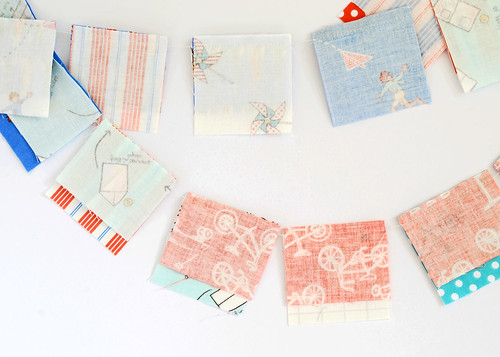
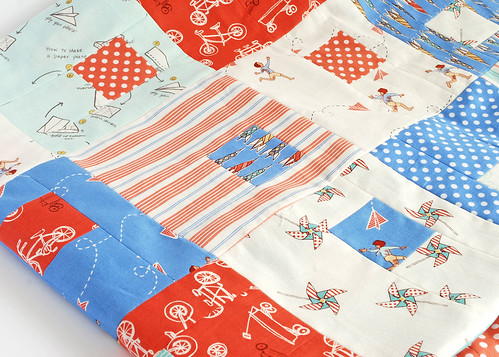
So to make four flying geese with unfinished dimensions of 6 1/2" wide by 3 1/2" tall I cut

1 x  7 1/4" square =  Large triangle or Goose
4 x 3 7/8" squares = Small triangles or Sky 


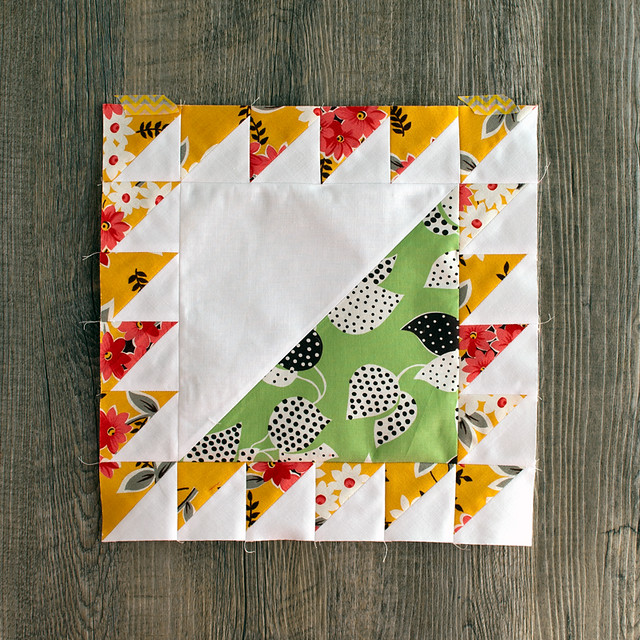
Everything went swimmingly until I was trimming them up at the end that I realised I'd ignored one vital part of the very clear instructions, sad face :(

PicMonkey Collage1 PicMonkey Collage2 wonky-edges-on-flying-geese

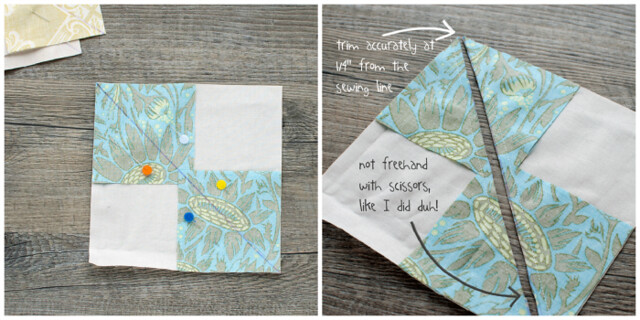
Yes the part where Melissa very says,

"Clip your threads and then align your ruler along the drawn center line.  Cut your pieces apart along that drawn line."

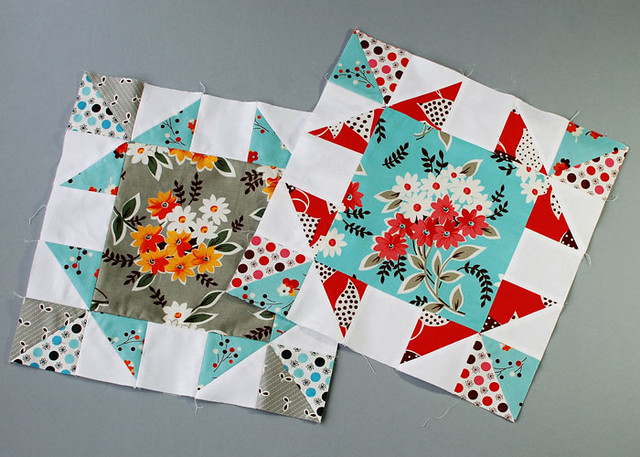
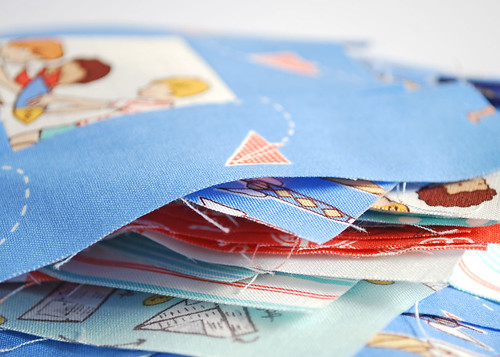
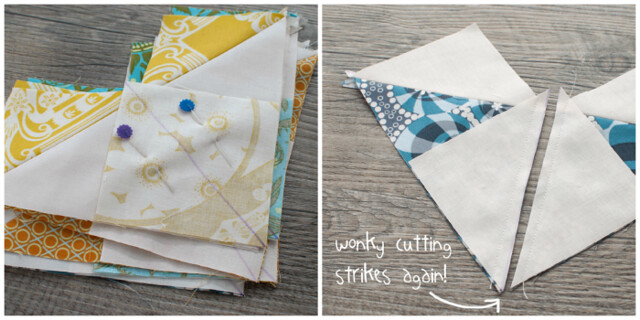
I for some reason just casually trimmed with scissors which I never really do so why I did it this time I have no idea. Anyway lesson learned I now realise that although you can get away with trimming like that on some blocks with these you need to be accurate or you'll end up with wonky edges like I did. Those funny little edges where I've circles above are where the edges of my blocks should be.

Not to worry since this method uses less fabric I had enough left over to make a new set of these colours which I cut properly and they came out very splendid indeed. I only remade one set though as I'm keen to get these sewn together so fingers crossed the ones with the wonky edges won't give me too much grief when piecing.

So alls well that ends well and when I next follow a tutorial for the first time I might just switch off the telly and concentrate properly but the again most likely I won't ;)

Now.... tonight do I get these sewn together or do I take up 3 sets of curtains?

Bye for now

post signature


no waste flying geese tutorial

Dimensions for flying geese for swoon block, unfinished 6 1/2" wide by 3 1/2" tall
cut 1 x  7 1/4" square =  Large triangle or Goose
cut 4 x 3 7/8" squares = Small triangles or Sky

Thursday, 31 January 2013

A busy old week


This week started rather brilliantly with a night out, yes a night out on a Monday, how decadent!! Last year myself and my pal Karen threw caution to the wind and bought tickets to go and see Paloma Faith in Glasgow. Those of you who know Glasgow won't be surprised if I say it was chucking it down with rain and blowing a gale but we didn't let that spoil the night. I have to say that Paloma was absolutely brilliant, absolutely amazing! I tried to take photos as we had a really good view of the stage but they didn't really work out so I don't have any to show you. I still have the songs whirling around in my head even now, boy she puts on a great show, she's very sweet, funny, very dramatic and can't half sing.

So on to this weeks sewing escapades....

This week I have swooned so that's me up to the grand total of four blocks, not bad for a years work eh! This block may be my favourite one yet but then I'll probably say that about the next one too.

swoon-block-4


Please try and ignore the hideous red carpet (and associated threads and fluff) in this photo, light is very hard to come by at the moment so this was the only place big enough with some form of daylight to take a photo today.

Also this week I've been doing a bit of last minute catching up with the Sisters' Ten Block of the Month run by Gen X Quilters. I'm so glad to be finally cutting into my Flea Market Fancy stash, it was one of those 'must have it, no idea what I'll do with it buys' so it's good to put it to use.


flea-market-fancy-bundle


January's block is Grandmother's Frame which went together pretty quickly. I did do the HSTs slightly differently from the instructions so for each set of 4 HSTs I cut 2 squares of fabric at 5.25" sewed all the way round at 1/4" from  the edge and then diagonally cut the square into 4 triangles.

  jan-sisters-ten-BOM-block

So that means I'm up to date for a very brief spell of time on the BOM front and made a teeny tiny bit of progress on the Finish-a-long list. Still got plenty to do though and I have a couple of commissions to do as well so plenty to keep me busy.

Bye for now

post signature

Wednesday, 25 April 2012

children at play quilt

children at play


Remember this bundle of Children at Play by Sarah Jane it's been waiting for a while to be made into a Juice Boxes Quilt, pattern by Allison at Cluck Cluck Sew.


cap-fabrics-cut


Well finally it's arrived at the top of my to-do-list. Better late than never as it needs to be finished before this weekend for my youngest's 5th birthday.


cap-ticker-tape


So I've had my head down and it's be cut, cut, cut. sew, sew, sew, interspersed with a few "Oh no you idiot why did you cut it that way....."? insert your own choice phrase there. Yes cutting out even the simplest of pieces is probably best not done at quarter to midnight, not if you want it to be the correct orientation and size.


cap-close-up


Not to worry Frumble and Eclectic Maker to the rescue and I was back up and running. The pattern is very easy and I am still very in love with this fabric collection.


cap-detail-1


Happily on Sunday Hubbie took the kids out and I got the quilt top finished. I am really running close to the wire (nothing new there) and J asks me every day if his quilt is ready yet. The backing fabric and wadding arrived today so guess what I'll be doing tonight.


cap-quilt-top


Another small tip - If when buying backing fabric you think "wow that's a good deal for 2 metres of fabric", you'll probably find when you open the parcel that arrives that it was in fact 2 half metres of fabric you bought - duh! Honestly I marvel at my ineptitude sometimes.

Linking up to WIP Wednesday for the first time in aaaages.

Anyway bye for now, must get back to the sewing machine.

post signature


Thursday, 20 October 2011

Dead Simple QAL progress

fabrics for the dead simple qal


I've been sewing like a mad thing since we got back and have finished piecing my Dead Simple QAL quilt top. It's made up of 16 different solids cut into 5"squares and then sewn into 12 x 16 rows.  In the end I decided to sew blocks of 4 squares before sewing them into rows and then sewing the rows together. I grouped colours together in what I thought were pleasing combinations. I alternated the layout of the the squares with the blocks hoping that it would give me the variation in colour layout that I was looking for.


ds qal 3


It turns out that some of my squares were less square (that's another story that'll I bore you with in another post) than others so lining them up properly worked well in some places and less so in others. I also found that when sewing the columns of squares together even though I pinned on either side of the seams some squares lined up at the corners and some didn't. This bugs me a bit especially in one row but I'm not gong to obsess about it and my daughter certainly doesn't care and neither do my 2 boys as they've both demanded to know when I'm making their quilts.


ds QAL 2


Now when I finished piecing this I was pretty pleased with it but now after photographing it I'm less so. I really don't like the colour combos on the last three columns on the right hand side and now that I've seen that I can't get it out of my head.  Also the turquoise I bought in Perth is too bright. Next time I make a quilt like this I'll mock up layouts on the computer first instead of just winging it. This colour scheme is really not my thing either. I am making it for my daughter and she's really tricked with it but if I had the chance to make it again I'd do it differently.

Here's a lovely quilt made by Brooke at Pitter Putter Stitch  made using similar kona solids with some grey added, kind of wish I'd made mine like this but with white centres. Kirstin vetoed adding white and since it's her quilt I went with that but ......hmmm think it might have been really nice with some white.


I had also considered adding a charm pack of Just Wing It but I reckoned I'd probably need 2 packs and to be honest I just don't have the cash for that right now. As it is I'll need to put this aside until next month before buying the wadding and backing fabric.

Anyway that's a bit of a long ramble and I'm hoping that when I dig this top out again to finish it I may not feel so meh! about it.


Why not pop over the the Lily's Quilts flickr group and see some other incarnations of the Dead Simple Quilt.

Bye for now


post signature

Friday, 7 October 2011

star mug rug

I don't seem to have done very much this week but I have finished my first mug rug. I used the star block for the front and some of my favourite favourite Ruby Star Rising for the back. The binding is from the Annie's Farm collection. I got this FQ from The Bramble Patch  which has a massive range of fabrics and possibly the fastest delivery ever.


star mug rug


It's very lightly quilted, just once round the outside of the star and then inside the central square. I know it's only one block and compared to the amazing quilts that you see out there in blogland it's incredibly simple but to me it's step forward towards advancing my meagre quilting skills. I'm thinking a sampler quilt would be a really good idea, although a longer term project it is the ideal way to learn new skills and try out new blocks.

I wanted to learn how to attach quilt binding totally by machine as I found my hands incredibly sore last time I did the hand stitching on the back of my Arcadia Quilt. The idea was to not only save my hands but time as too. Well I lost count of the number of times this binding had to be taken on and off, frustrating or what and not time saving at all. I tried various techniques and in the end I reckon this one here by Red Pepper Quilts is the one for me. I will say that I still can't manage to stitch in the ditch neatly so I stopped trying and just stitch very closely to the edge of the binding on the front and I'm happy with the results.

back of star mug rug

Also this week my Aurifil from Felicity Quilts arrived yipee! I've not managed to try it out yet but it does look lovely don't you think?

aurifil


It's a short one from me today, like I say I've not had the most productive week and the schools are off next week so things aren't likely to improve on the wips any time soon.

Bye for now


post signature

Thursday, 15 September 2011

this weeks progress

Well I think this wip Wednesday thing is really helping me make progress with my projects obviously I'm now a day late with this post but I'll ignore that if you can.


cosmo cushion cover

cosmo detail

progress
cosmo cricket cushion cover
The top is now finished, quilted and I even dug out the serger and finished the edges. Just need to get a concealed zipper now so this should be completed by next week.

dead simple qal
Colours chosen, order with Sew Fresh Fabrics will be placed today (best deal I could find to buy fat quarters and that's including postage to the UK).

wip cross body bag

keyka lou cross body bag
Outer is completed, lining ready to sew, handles to cut

completed 
noodlehead 241 tote
gym bag for youngest


no progress
boy quilt
dresden qal
all those things I was going to make for the shop


new
noodlehead go anywhere bag


hmmm thought I'd finished more than this, never mind I'm definately making more progres than last month so musn't complain.

Oh and I thought I'd just mention that I'm another year older on Saturday (groan!) so to celebrate I thought I'd have a little giveaway so stay tuned ;)


post signature

Monday, 12 September 2011

the dead simple QAL- I can't resist any longer

dsq palette

Well I know I'm not great at QALs, the first one took me a year to complete and the other two are far from finished. I start wth great enthusiasm but fairly rapidly get distracted and eventually the QAL project ends up at the back of the wip pile. This time however I was already planning a quilt for my daughter  along the same lines as Lynne's Dead Simple QAL anyway. So I'm jumping on the QAL train with more optimism than normal of reaching destination 'completed project'. 


The idea behind the Dead Simple QAL is to choose a palette of colours and then choose your fabric based on the palette. The actual quilt design is very simply made up of squares so the colours will be doing the talking.

The palette I've chosen is taken for my daughter's current bedding and to be honest the colours are well out of my comfort zone. I usually go for one main colour (unless I've bought a precut bundle where the colours are chosen for me) and the rest is very tonal so this jamboree of different colours is a bit scary. 

I used Picnik to  make up my palette but there are loads of beautiful pre-made palettes on Design Seeds and also Photo Card Boutique many of which I've added to my Pinterest board for future use. Why not give it a go and pop along to the Lily's Quilts flickr group to see other palettes and fabric choices.

I'm off to waste a few hours choosing fabric.

Hope you've had a great weekend, see you soon.

post signature

Wednesday, 31 August 2011

mojo returns

Well it's been a while hasn't it?  There has been a lot going on here and following the 'if you can't say anything nice don't say anything at all' route I haven't felt like blogging. There's been family health problems and hospital visits (all ok now don't worry) plus impending unemployment once again for hubbie dearest so I've been in a grump really. Don't get me wrong there's been good things happening too like birthdays (how did they end up being 14 and 11 already arrgh!) and visits to the seaside and also a fabulous fabric giveaway win and swap.

I also took a break from sewing due to.... yup tennis elbow/RSI again! Well I say 'again' but in truth it never goes away, I just manage to ignore it better at some times than others. However I'm now fed up of waiting for the nagging pain/tension/tingling to go away I have put my wrist splints on and am back to it.

So that's that out of the way, how are you all? The schools are back here and my youngest is now in nursery for 2.5hrs a day so I have some much appreciated time on my hands. It's a real treat to have some peace and quiet, those of you with kids will understand this I'm sure. I love them to pieces but sometimes a little peace and space to think is definitely required.


cosmo 9 patch
cosmo 9 patch 

Anyway what am I up to? Well today I decided to try out making a disappearing 9 patch block. It attracted me for many reasons, quick, easy and a great way to use a charm pack. I bought this charm pack from an Jeanette of Platypus Quilting on Etsy a while back, it's a mixture of of Cosmo Cricket Early Bird and Tailor Made. To learn how to do this block I used this video tute and it worked out great. There's another tute on there that I really fancy too, it's here if you want a look.

cosmo charm pack

I'm not really sure what I'm going to do with this block, I might make some more or I might make a cushion for my sewing chair. Infact yes I think I'll sew some more blocks and make a cushion and a new pincushion too.

Other projects on the go include an almost finished bag using the Noodlehead 241 tote pattern and a cut out but not sewn Keyka Lou Cross-Body Bag. I'm also making a Cloud 9 Free as a Bird cushion plus a zipper pouch using the left over AMH charms from my attempt at hexagon making. It turns out hexagons and me don't go, well it's not so much the hexagons as the hand sewing that's the problem. Plus I've still to finish my Big Fat Dresden from the Lily's Quilts QAL from ages ago.

So there's plenty to be going on with just now and I really must dash but not before saying saying thank you to you all for sticking with Sew Quine Stitches despite the lack of posts.

Bye for now

post signature

Related Posts Plugin for WordPress, Blogger...